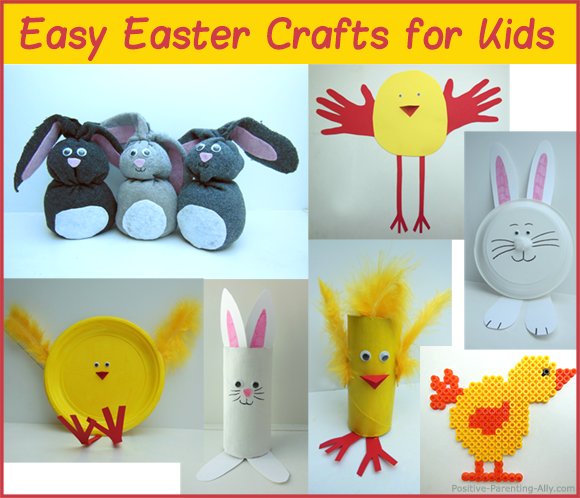
Cute and Easy Easter Crafts for Kids
Looking for some fun and easy Easter crafts for kids? Then I bid you welcome to this Easter craft page with lots of cute DIY ideas for getting kids active and creative this spring.
Here you will find very simple step-by-step DIY Easter projects that are fairly quick to do (and thus hopefully won't bore potentially impatient minds), and which don't require that many craft accessories.
The kids Easter crafts, I'll inspire you to make on this page are:
- A sweet paper plate chicken and paper plate bunny
- Adorable sock bunnies
- A cute toilet roll chicken and toilet roll bunny
- A funny handprint chicken
- Various Hama beads Easter crafts
Let's Get Going with These Adorable and Easy Easter Crafts for Kids
A Cute Paper Plate Chicken
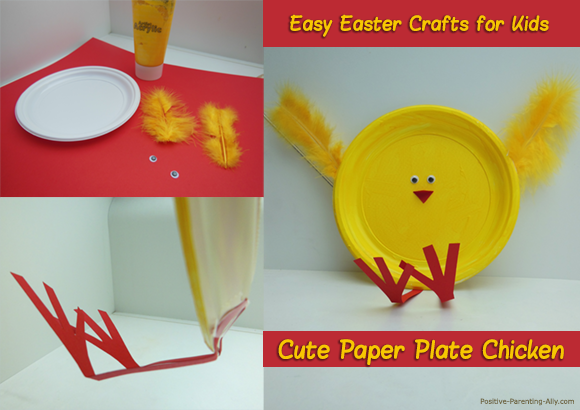
This paper plate chicken a great example of simple and easy Easter crafts for kids. All you need for this adorable chicken are:
- A pair of scissors, a pencil and a paint brush
- A paper plate or plastic plate
- Some yellow acrylic paint
- Two yellow feathers
- Some orange cardboard / paperboard
- Craft wiggle eyes (you can just use a black pen if you don't have these)
- Some glue and / or sticky tape
Here are some instructions to follow if you're not comfortable just looking at the picture and winging it. 😉
- Paint the paper plate with the yellow paint. If one layer
isn't enough, just apply another layer. Let it dry.
- Draw a pair of chicken feet / legs and and a small square
(for the beak) on the orage cardboard, and cut them out with a pair
of scissors.
- Fold the beak so that it becomes triangular, and glue the
beak and the wiggly eyes onto the plate.
- Bend the legs and glue them on to the back of the plate
(look at the picture above). If you find that they won't stick,
you can use some sticky tape.
- Finally glue on the feathers for wings, and you will have now have created the cutest paper plate chicken to decorate your home.
A Sweet Paper Plate Bunny
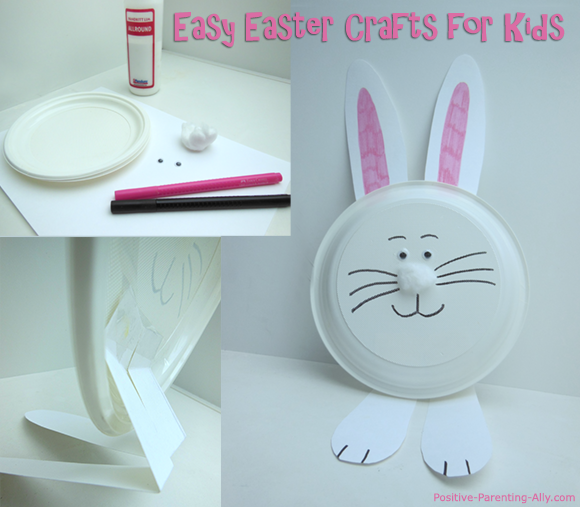
This is the bunny version of the Easter paper plate chicken. The paper plate bunny is just as easy to make as the chicken, and it is just as cute.
What you need to make it is:
- A pair of scissors, a black pen and a pink pen
- A paper plate or plastic plate
- Some cotton wool
- Some white cardboard / paperboard
- Some glue and / or sticky tape
- Craft wiggle eyes (you can just use a black pen if you don't have these)
This is how you go about creating your Easter paper plate bunny:
- Take the paper plate and glue on the wiggly eyes and make a
small ball out of the cotton wool and glue it on as nose (if the
paper plate isn't white, make sure you paint it white first).
- Draw the mouth, eyebrows and whiskers on the paper plate,
too.
- Draw the ears and legs / feet and cut them out with a pair
of scissors. They don't have to have precise measurements - you
can just look at the picture above and imitate what I've done.
- Bend the legs and glue them on to the back of the plate
(look at the picture above). If you find that they won't stick,
you can use some sticky tape.
- Glue on the ears on the back of the plate as well. And that's it! You're done!
Lovely Easter DIY Sock Bunnies
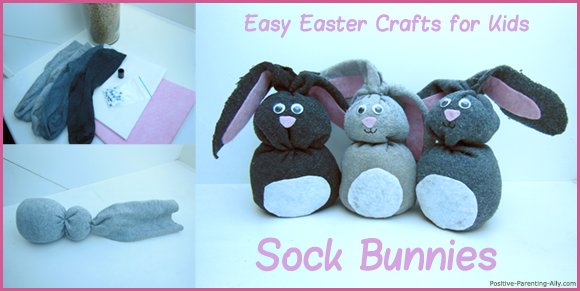
These adorable Easter sock bunnies might look complicated to do, but really, they are not. They are actually quite easy Easter crafts that your kids can do with a little help from you.
Here is what you need to make these Easter sock bunnies:
- A pair of scissors and some glue
- A couple of socks - I just nicked some of my son's old socks (make sure they don't have holes, though)
- Some colored cloth in white and pink (I used some dish cloths I had in my drawer)
- Some black thread
- Some uncooked rice
- Craft wiggle eyes (you can just use a black pen if you don't have these)
Here are the instructions for making these cute sock bunnies:
- First we will make the rabbit body. So take a sock and fill
it with rice until the sock has the approximate size of your
clenched fist. Then take some thread and close the sock just
above the rice.
Then you fill in some more rice, but not as much as the first time around. Here we making head, so it needs to be smaller. Once again, close the sock with some thread (look at the picture above). - Now we need to make ears, and to do that you need to take
your scissors and cut down from the top of the sock until you
reach the head. You cut down on two sides, so that you get two
ears.
- Now it is time to make the white belly, the pink nose and
the pink areas in the ears. So take your white cloth and cut out
a round circle that fits the rabbit body, and by rule of thumb,
cut out the nose and ears from the pink cloth.
- Glue on the wiggly eyes as well as the pink areas for the
ears, the nose and belly.
- Finally take the black thread and sew on a mouth as shown in
the picture.
- Congratulations, you've now made the cutest Easter sock
bunnies for your windowsill.
Really Simple Handprint Chicken
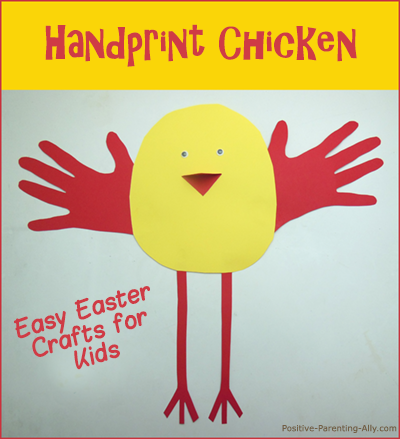
This super cute handprint chicken was actually an idea I got from my son's kindergarden. It's so easy to make and really personal at the same time as you have to use your little one's handprints.
Here is what you need to make the Easter handprint chicken:
- A pair of scissors, a pencil and some glue
- Some yellow and orange cardboard / paperboard (as you can see, I didn't have any orange cardboard, so I had to settle for some red)
- Craft wiggle eyes (you can just use a black pen if you don't have these)
Here is how you go about creating your personal handprint chicken:
- Draw a big oval circle on the yellow cardboard and cut it
out.
- Draw a square and the long legs on the orange cardboard and
cut them out.
- Draw around your kid's hands on the orange cardboard and cut
them out.
- Attach the legs and handprints on the back of the yellow
oval circle with some glue.
- Glue on the wiggly eyes and bend the orange square so that
it forms a triangle and glue on that one too (look at the picture
to see what I mean).
- Hang up the finished handprint chicken e.g. on a window or
on a cupboard with some sticky tape.
Adorable Easter Toilet Paper Roll Chicken
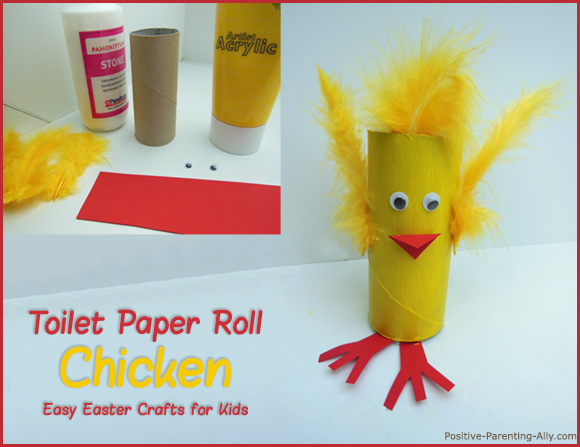
Don't throw out your toilet paper rolls just yet, they can be used to make lots of easy Easter crafts. First I will show you how to make a cute toilet paper roll chicken and then I will show you how to just as easily make a toilet paper roll bunny.
These are the things you need to have to make this lovely little toilet paper roll chicken:
- A pair of scissors, a pencil, a paintbrush and some glue
- Some yellow acrylic paint
- A toilet paper roll
- Some orange cardboard / paperboard (as you can see, I didn't have any orange cardboard, so I had to settle for some red)
- Craft wiggle eyes (you can just use a black pen if you don't have these)
- Some yellow feathers (I used three)
Here are the step-by-step guidelines for making the toilet paper roll chicken:
- With your paintbrush paint the toilet paper roll yellow and
let it dry.
- Draw a square (the beak) and the legs / feet on the orange cardboard and
cut them out. (Make sure that the legs are long enough to be
able to be glued on inside the roll).
- Bend the beak so it forms a triangle, and glue it on the
toilet paper roll along with the wiggly eyes.
- Glue on the legs inside the toilet roll (you need to bend
them, to be able to do this)
- And finally glue on the feathers for wings and for a lock of
hair.
- Voila! Your Easter chicken is done!
The Cutest Toilet Paper Roll Bunny

There is no end to the creativity that old toilet paper rolls may inspire when it comes to easy Easter crafts. Here I will show you how to very easily make a toilet paper roll bunny as an adorable and easy Easter decoration.
Here is what you need to make the toilet paper roll bunny:
- A pair of scissors, a pencil, a black and pink pen, a paintbrush and some glue
- Some white acrylic paint
- A toilet paper roll
- Some white cardboard / paperboard
- Craft wiggle eyes (you can just use a black pen if you don't have these)
Here are the very simple step to make the toilet paper roll bunny:
- With your paintbrush paint the toilet paper roll white and
let it dry.
- Draw the legs / feet and the ears on the white cardboard and
cut them out. (make sure that the legs and ears are long enough to be
able to be glued on inside the roll).
- Color the pink areas on the ears (look at the picture above)
and then glue on the ears and legs inside the toilet roll (you need to bend
the legs to be able to do this).
- And finally glue on the wiggly eyes and take your pink
pen and color a nose and with your black pen, draw some whiskers
and a mouth.
- And that's it. Simple right?
Hama Beads Easter Crafts for Kids
Here are some very easy Hama beads Easter projects for kids. Your kids may either use the finished bead plate decorations as inspiration, or you can choose to download the Easter Hama bead templates below and print them out. It's all up to you.
All the Hama beads designs are made on a simple large square bead plate, so to make these easy Easter crafts you don't need to go out and find any fancy shaped bead plates.
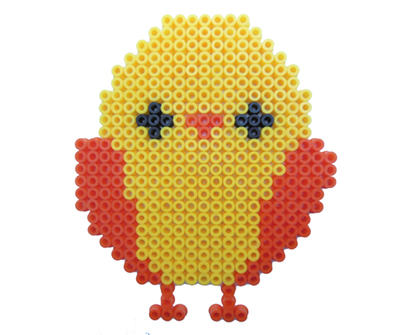
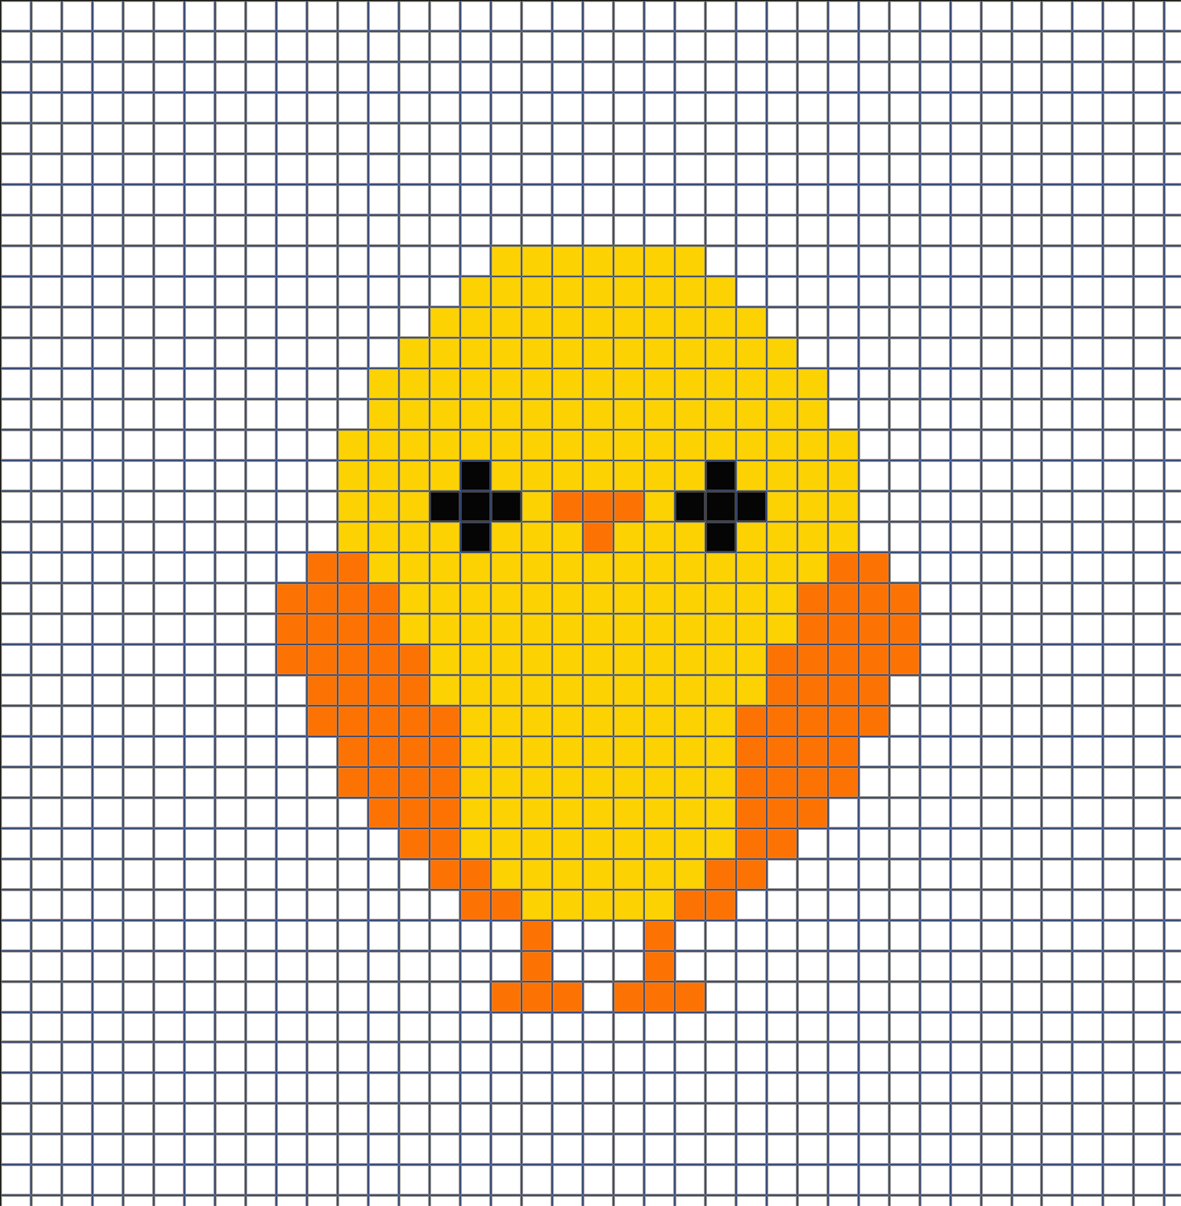
Hama Beads Easter Chicken
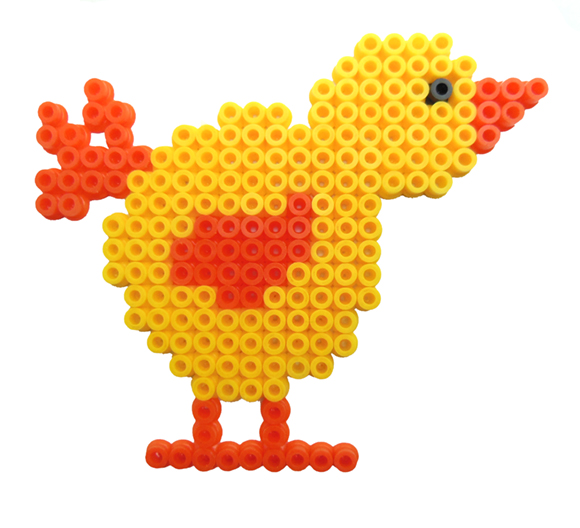
The first Hama bead design I want to show you is a simple Easter chicken. To make this Hama bead chicken, you only need three colors:
- Orange
- Yellow
- Black
If you want a Hama bead template for the Easter chicken, please just download the design below.
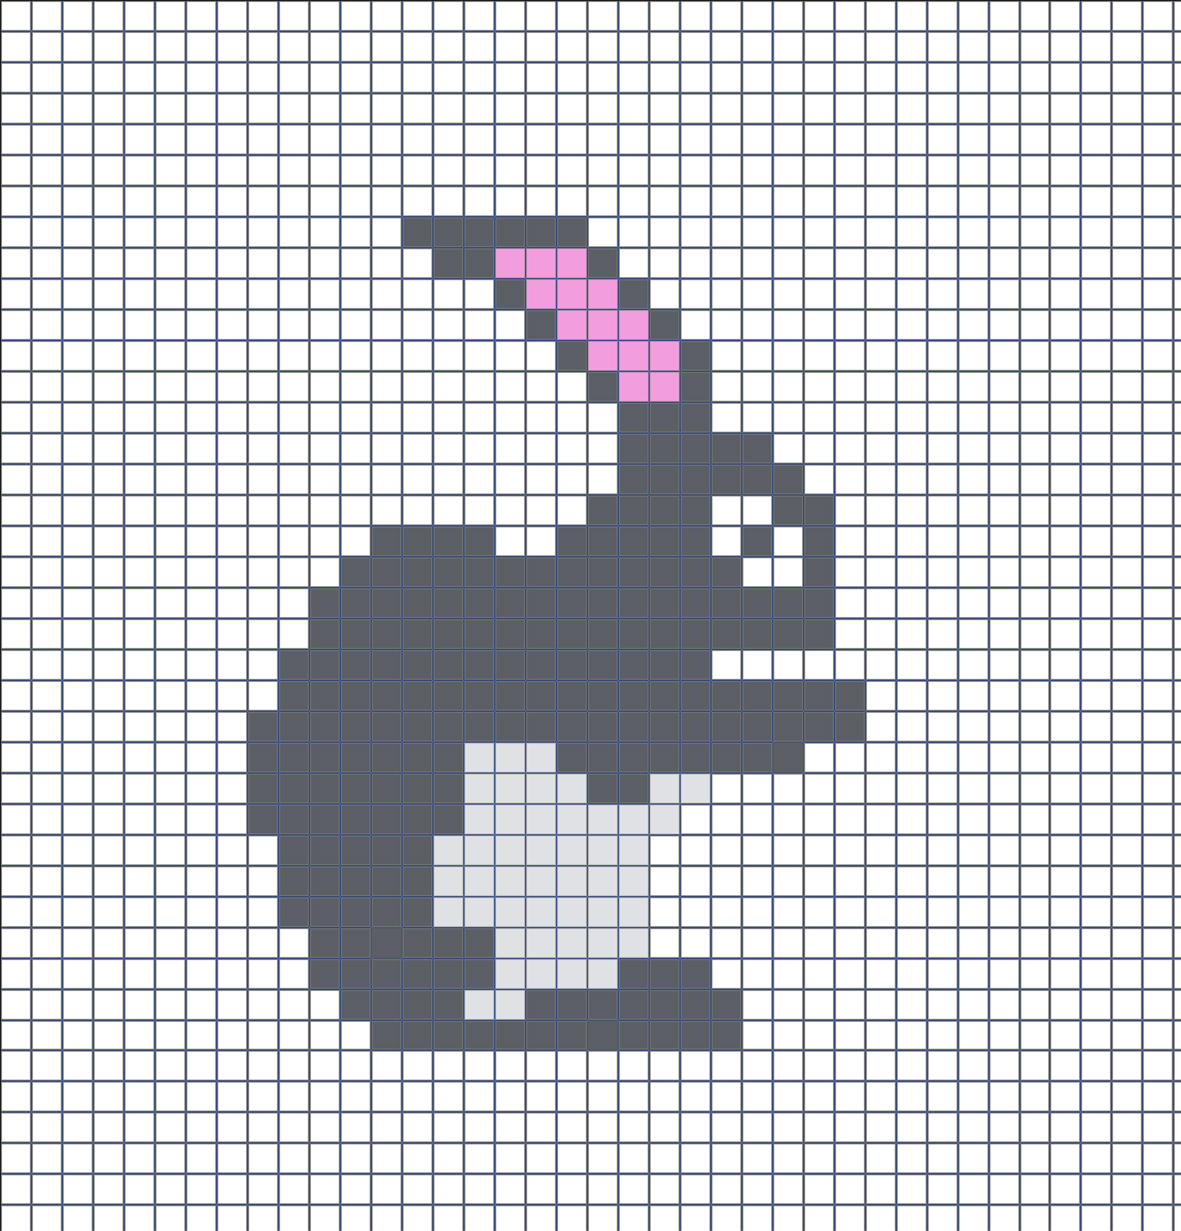
Cute Hama Beads Easter Bunny
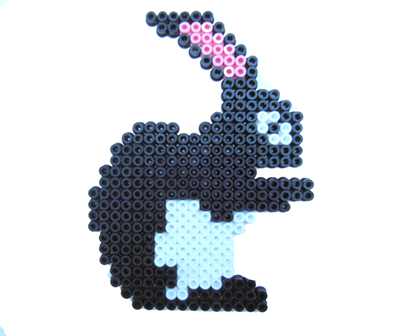
This cute Hama beads Easter bunny can be made in both black (as I've done) or brown or gray. Whichever color suits you or that you have on stock.
For this Easter bunny, you also only need three colors:
- Pink
- Black
- White
If your kids want to use a Hama bead template for the Easter bunny, just download the one below.
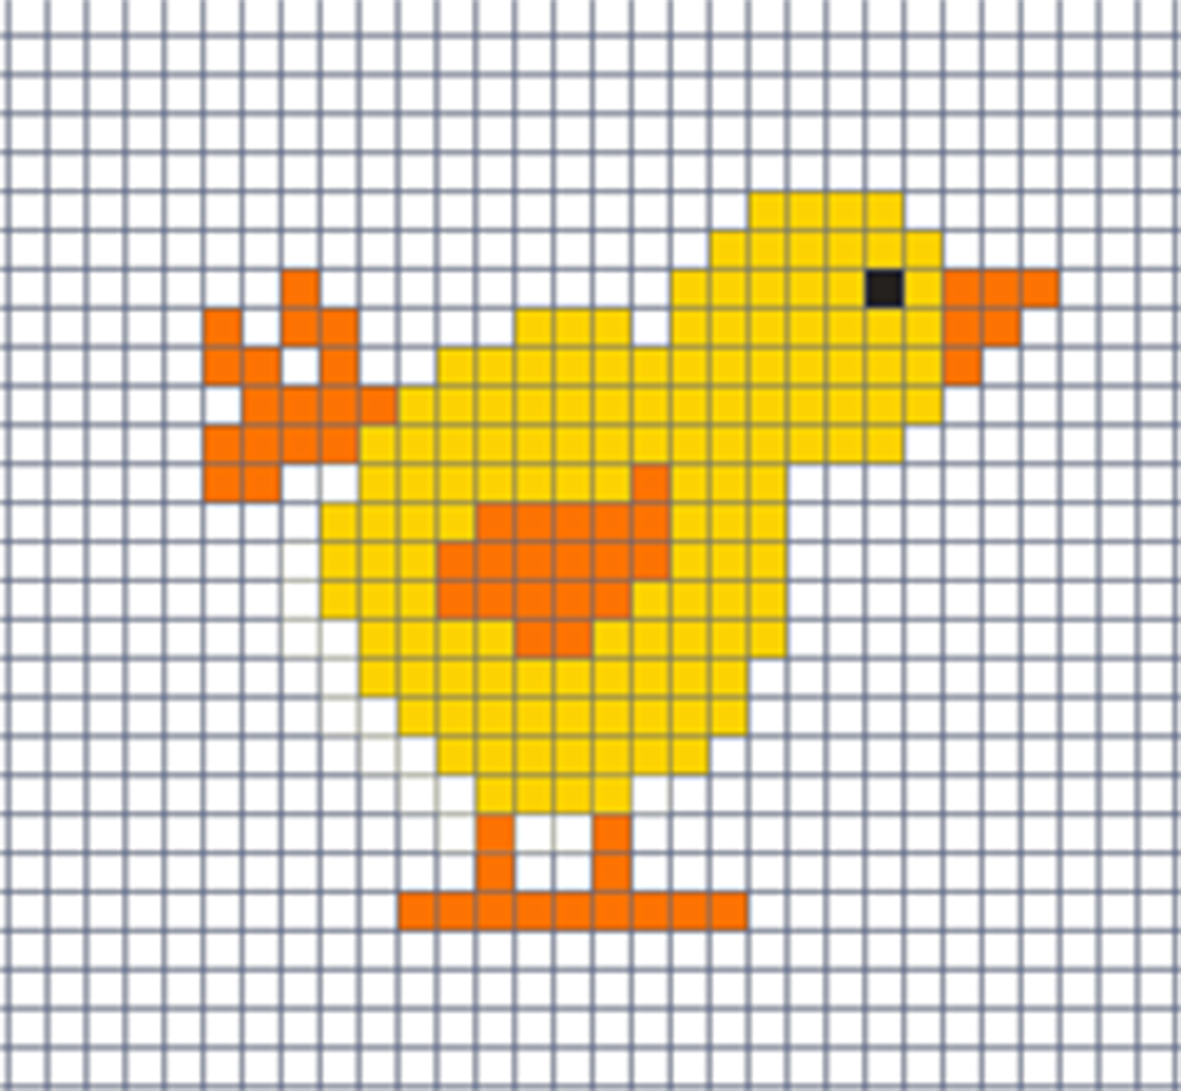
Hama Beads Easter Chicken in an Easter Egg
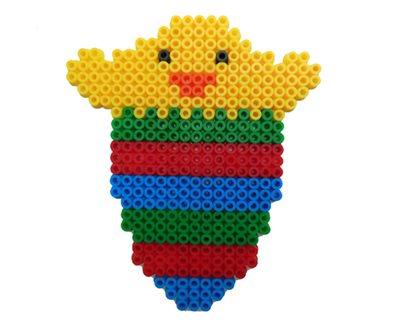
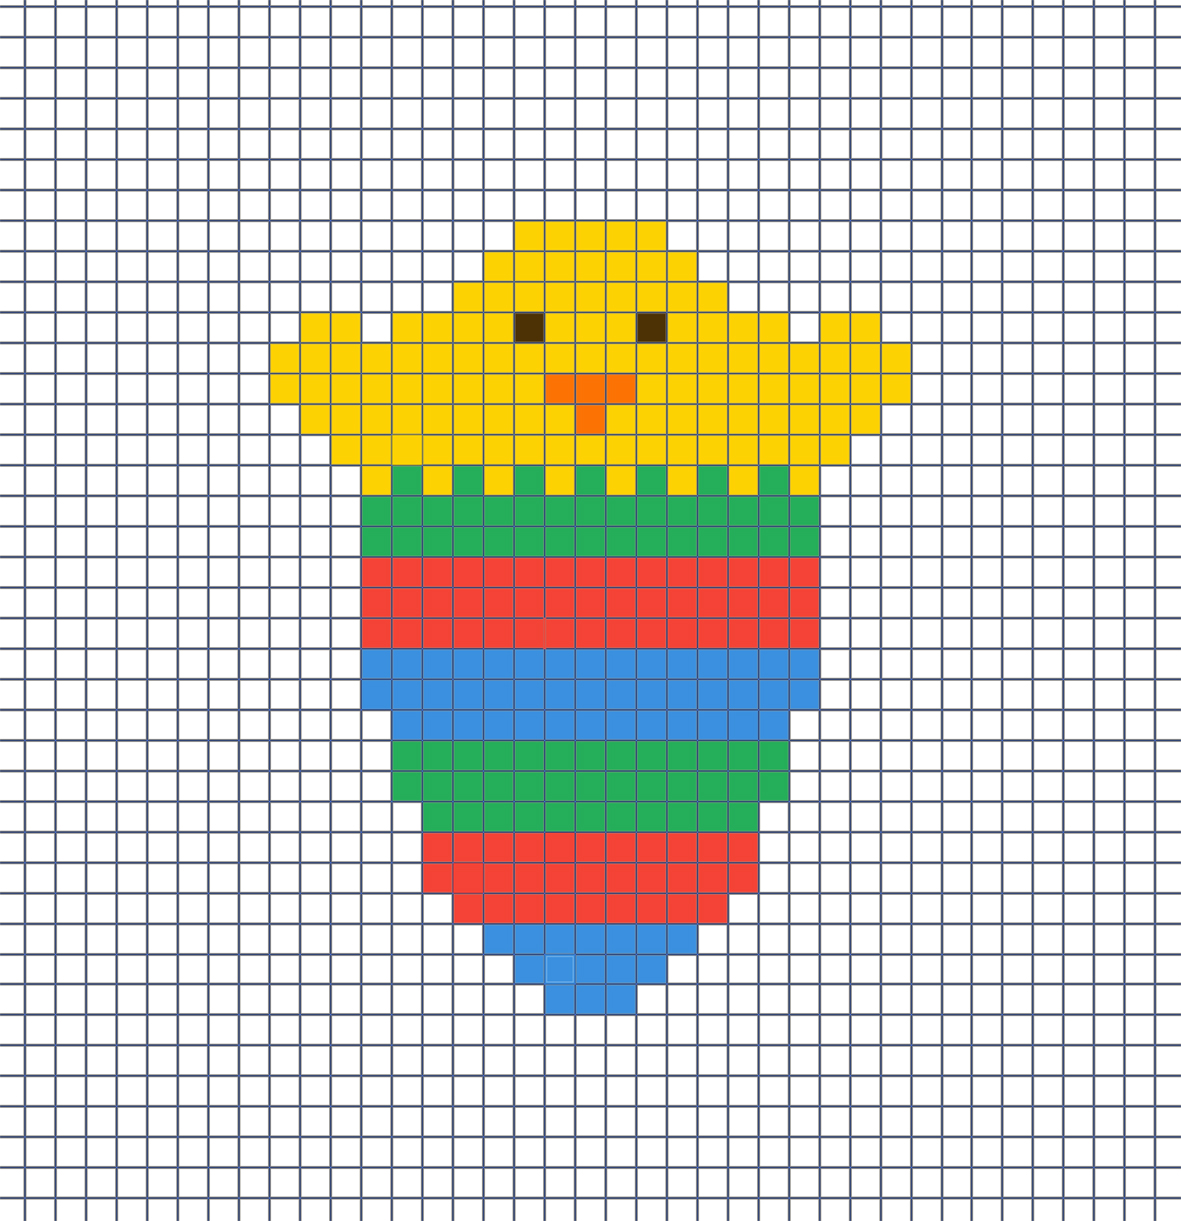
Here is another Easter chicken made of Hama beads. This one has just hatched from a colorful Easter egg.
To make this easy Easter crafts design, I've used a bit more colors:
- Yellow
- Orange
- Black
- Green
- Blue
- Red
Download the Easter chicken Hama bead template below:
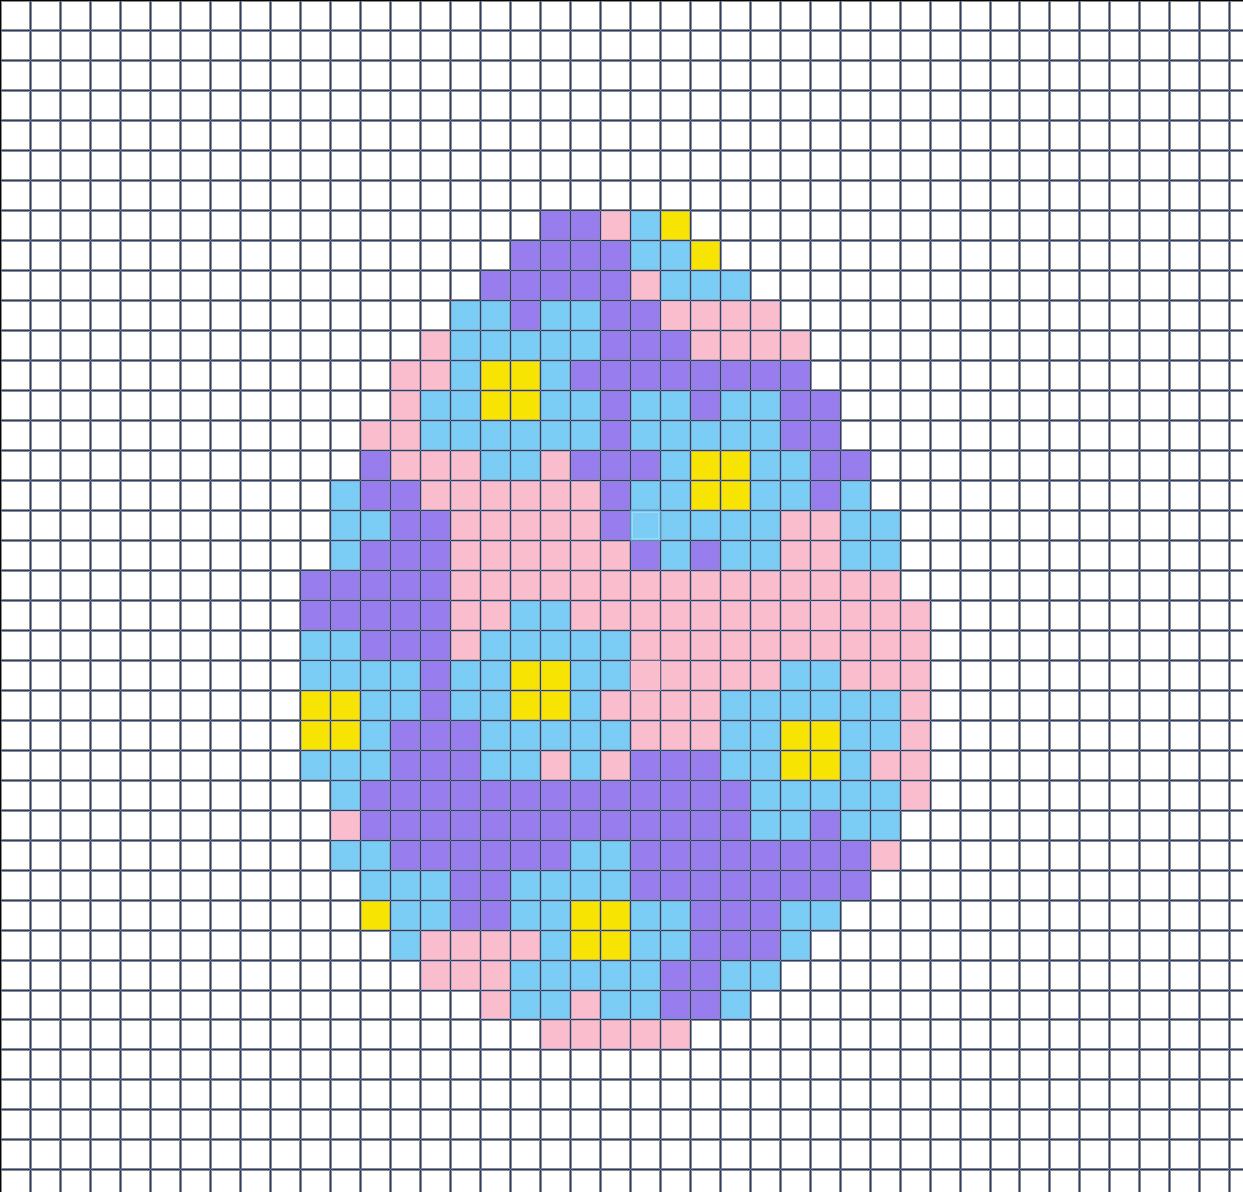
Decorative Hama Bead Easter Egg with Flowers
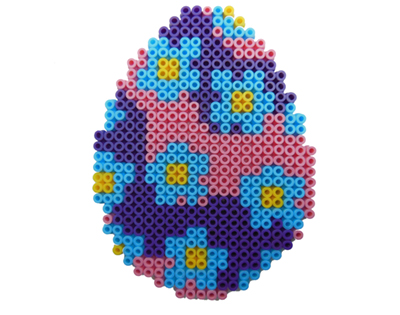
There are many ways to decorate an Easter egg - this goes for Hama beads Easter eggs too. Here I have made a colorful Easter egg with blue flowers with a pink and purple background.
The colors I've used are thus:
- Blue
- Yellow
- Pink
- Purple
To download and print this easy Easter crafts egg design template, just click on the 'download' button below.
Cute Easter Chicken from Hama Beads
Here is another version of the proverbial Easter chicken. This Hama beads Easter chicken only consists of three colors:
- Yellow
- Orange
- Black
Please find the Hama beads Easter chicken template below:
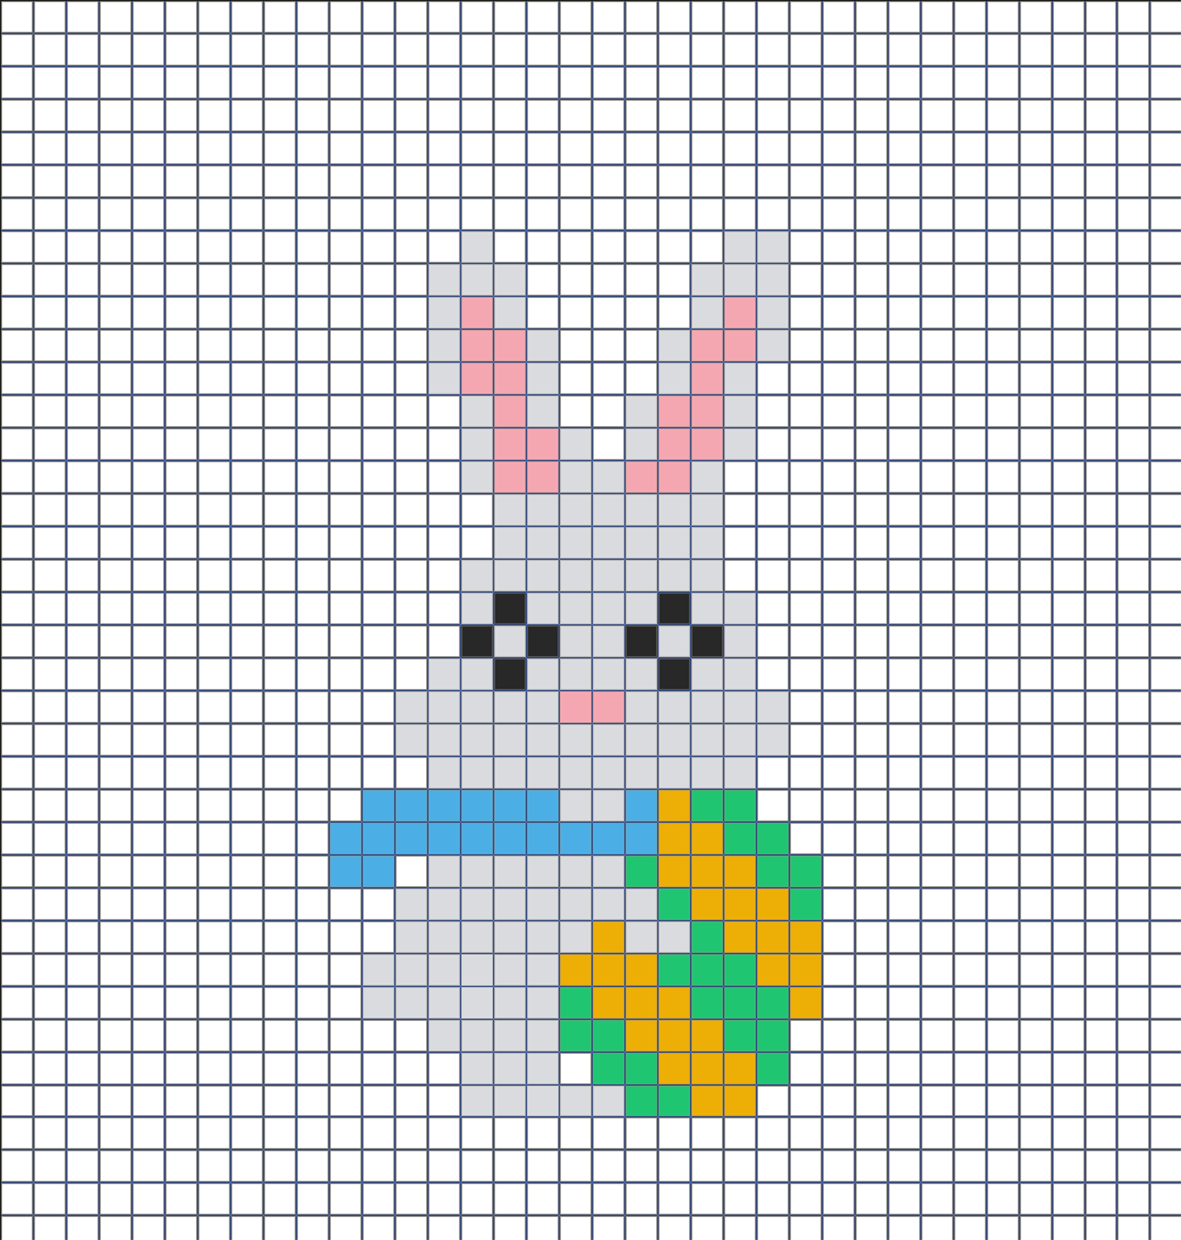
Hama Beads Easter Bunny with Easter Egg
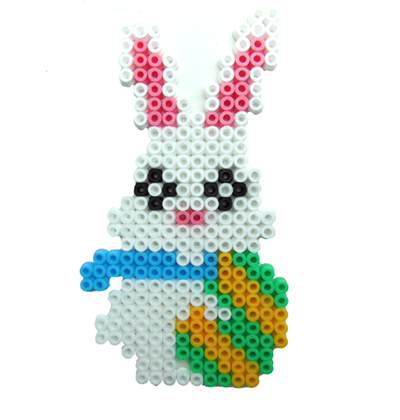
This Hama beads Easter bunny might be a little bit more complex to do, but still it's rather small, so it should definitely be doable for smaller children too.
The colors you need to make this white Easter bunny are:
- White
- Pink
- Black
- Blue
- Yellow
- Green
To download this Hama beads Easter bunny template, please click on 'download' below.
That was it for now. I hope that you and your kids found something inspiring on this easy Easter crafts page. To find more Easter inspired pages, please follow one of the links below this article.
I wish you all a very happy Easter.
Your Positive Parenting Ally,
Birgitte

Want to stay in touch and get the latest news?
Sign up
for my free newsletter
Parent Coaching
- For Inner Peace, Clarity and a Deeper Connection to Your Child
 Being a parent can feel like a double-edged sword. Life with kids may feel like the greatest gift you have ever received, while at the same being hugely challenging, often leaving you confused, stressed and overwhelmed.
When we feel like this, we've lost touch with ourselves. We can't hear our own inner voice, and it's difficult to know what is 'right' for us and how to act.
I offer in-depth parent coaching to help you regain your balance and get back in touch with yourself. From a place of inner peace and clarity, your will find your own answers which will help you reconnect with your child from a place of unconditional love and acceptance.
Read more about my parent coaching here.
Where Would You Like to Go Next?
 Free Printable Easter Card Gallery - Both Modern and Vintage Designs |
 Cute Printable Easter Coloring Pages for Kids |
Back to the top of this page about Cute and Easy Easter Crafts for Kids
Go to the Positive Parenting Ally Homepage


Want to stay in touch and get the latest news?
Sign up
for my free newsletter